Overview
Presentations let you compile Brightspace ePortfolio items into a web project to showcase your achievements. Your presentations can have multiple pages. Presentations provide a polished, professional medium to demonstrate your learning and accomplishments.
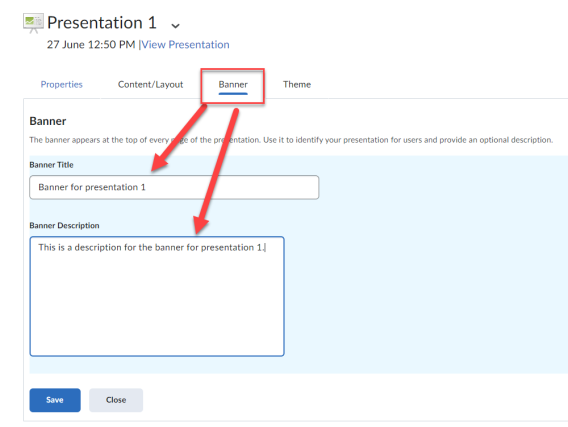
A banner appears at the top of every page in a presentation. The presentation title usually appears in the banner, much like a header in a book. You can include additional text in the banner as a description. The theme of the presentation controls the style of the banner, including the background and fonts used.
Themes are default style templates that give your presentations a consistent look and feel. Themes are comprised of styles which control one aspect of the design. For example, there are separate styles that control the look of titles, links, dates, and images.
Presentation themes are provided, but you may be able to change some or all aspects of a theme.
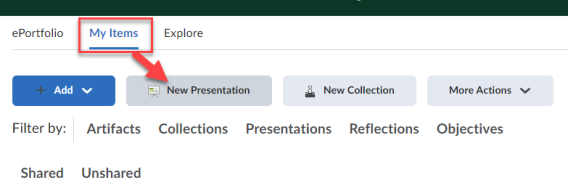
1. On the navbar, locate and click on ePortfolio.
2. On the My Items page, click New Presentation.
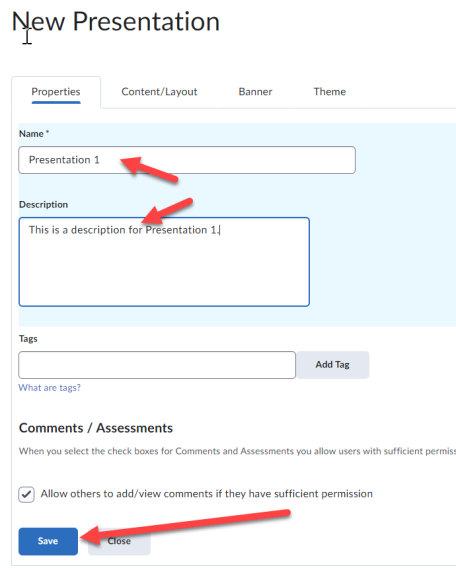
3. In the Properties tab, enter your presentation details.
4. Click Save.
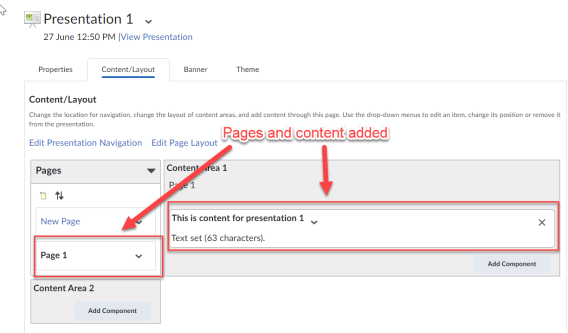
5. In the Content/Layout tab, do any of the following:
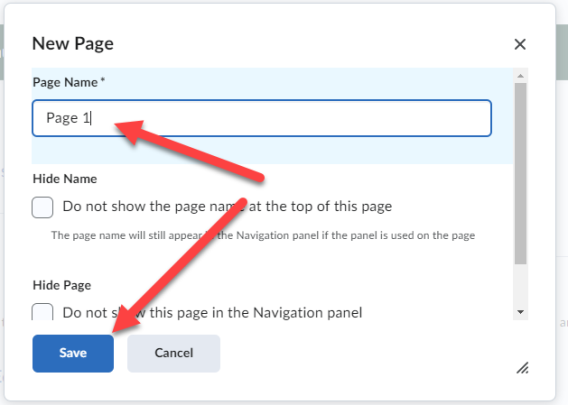
- To add pages to your presentation, in the Pages panel, click the New page icon. Enter your page details. Click Save.
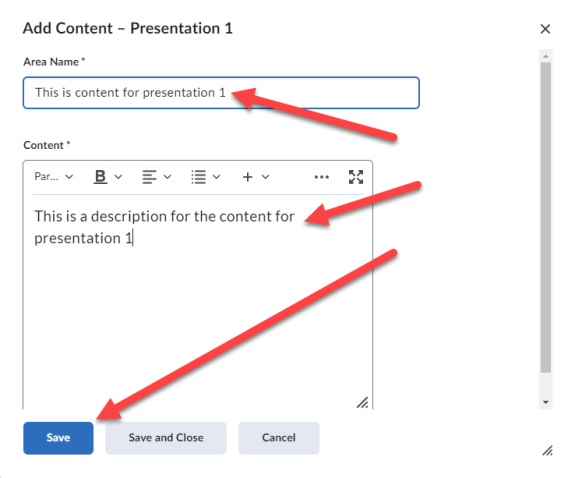
- To add content to your presentation, in a Content Area panel, click Add Component. Locate your component, select it, and click Add.
6. In the Banner tab, enter your banner details.
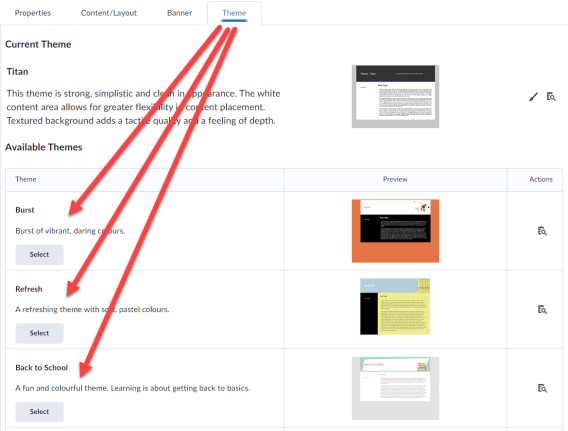
7. In the Theme tab, do any of the following:
- To edit your current theme, in the Current Theme area, click the Edit Styles icon. Make your changes. Click Save.
- To select a new theme for your presentation, in the Available Themes area, click Select > Set Theme.
Result
The presentation has now been saved with all of the settings you added.