Setting up groups in Brightspace
Often, students will work in groups to do a project. Brightspace allows you to set up groups in a variety of ways. You can also set up group discussion boards that are only available to group members. Groups can also submit a single assignment that you can then assign a group grade.
This article contains the following sections:
B. A video that demonstrates how to complete this task (4:42)
C. Adding additional members to the group
D. Group Overview/Moving users between different groups
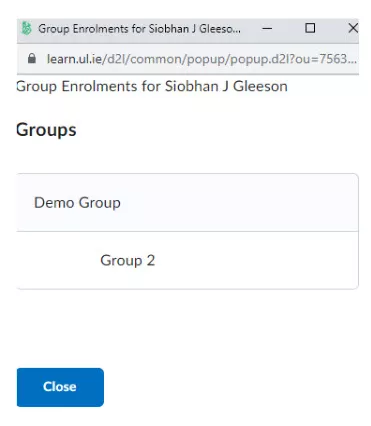
E. Checking what group a users has been added to
G. Targeting announcements to one or more groups
A. Setting up groups
Complete the following steps to set up groups in Brightspace.
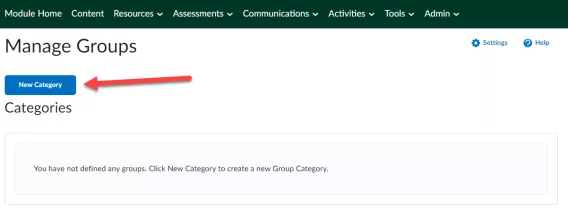
1. In the Navbar go to Class Organisation > Groups.
Note: The location of groups may differ based on the navigation bar associated with your module.
2. Click New Category to create a new category for the group.
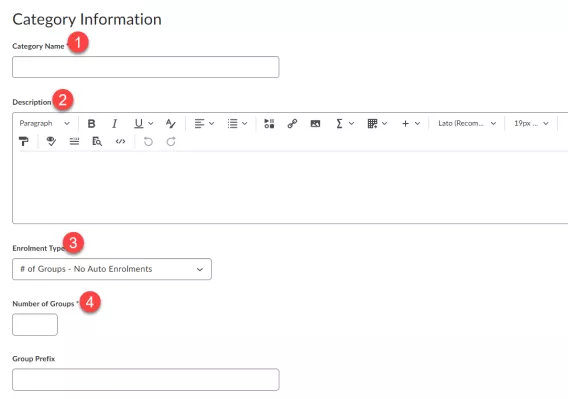
3. Enter a Category name (1). e.g Chemistry
4. Enter a Description (2) that will be visible to the students.
5. Select which Enrollment Type (3) you would like to use from the list below:
Enrollment Types
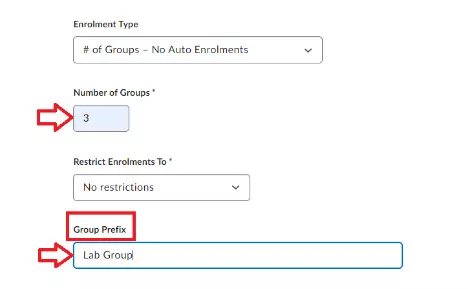
- # of Groups – No Auto Enrollments – set the number of groups, and the instructor will manually assign students (In this example this option will be selected with 3 groups)
- Groups of # – set the group capacity, i.e. “groups of 20”
- # of Groups – set a group limit, i.e. “9 groups total”
- Groups of # – Self Enrollment – set the group capacity and allow students to self-enroll
- # of Groups – Self Enrollment – set the group limit and allow students to self-enroll
- # of Groups, Capacity of # – Self Enrollment – set the group capacity and number of groups, and allow students to self-enroll
- Single user, member-specific groups – set up groups of 1
If you choose the Groups of # or # of Groups enrolment types, you will have three additional options under Advanced Properties.
-
Auto-enroll new users – If enabled, this setting will automatically add any new students to a group in this category if they are added to the course later.
-
Randomize users in groups – If enabled, this will enroll students in a random order. If this is not enabled, students will be enrolled based on their order in the class list.
-
Make category and group descriptions visible to group members.
6. Enter the Number of Groups required (3) e.g., 3.
7. Input the ‘Group Prefix’ (4). This will go before the number of each group within the category. For example, Lab Group
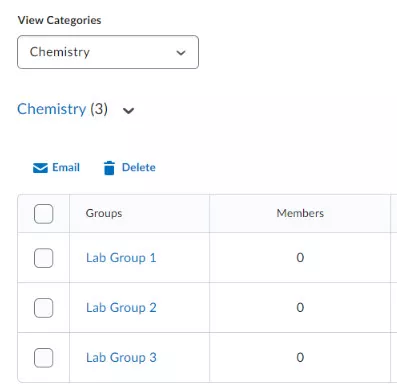
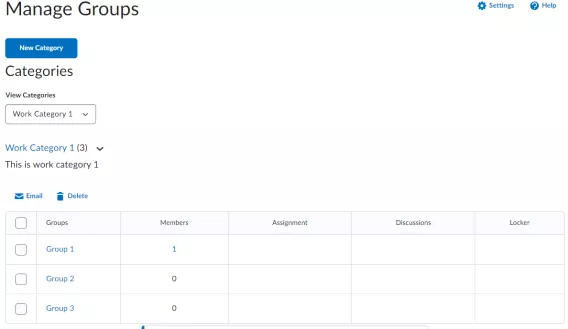
In this instance, we selected 3 groups called Lab Group -
3 new groups have now been created Lab Group 1, Lab Group 2, Lab Group 3
In Advanced Properties, if you have chosen self-enrolment, you can set up a date by which students have to self-enrol. If you have chosen auto-enrolment, you can choose whether new users will be enrolled automatically and whether the groups should be random of alphabetical.
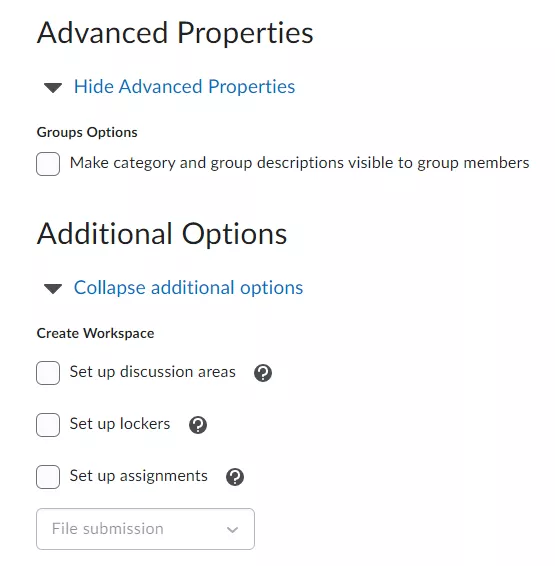
- Set up Discussion areas – This will set up a Discussion Item that only group members can use. The instructor can also view and participate in the discussion.
- Set up lockers – Use the Locker tool to upload and store files in Brightspace. Locker enables you to upload files from your PC or to create new HTML files. Your personal locker area is not course-specific. You can access the locker from anywhere in Brightspace and store all of your files together.
- Set up assignment submission folders – This allows you to immediately create an Assignment that will be associated with these groups. This assignment will allow a group submission. You can also create a group assignment later following these instructions.
Note: If you tick the box for Discussion areas then you fill in additional information that will create the forum for you as well as the topics inside it for each group.
If you choose not to tick this box, you can navigate to the Discussions page and create the forum and topics yourself.
8. Click Save
Result
The new groups (3) have now been created.
There, you can View Enrolment or Enrol Users.
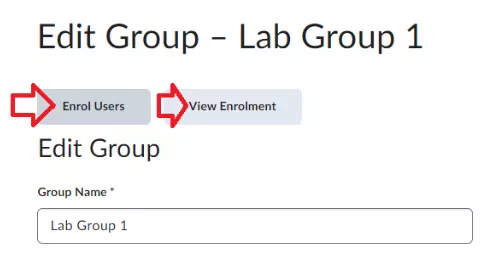
4. Click Enrol Users. The class list appears.
5. Add additional students, if necessary, by ticking the box next to the students name.
6. Click Save.
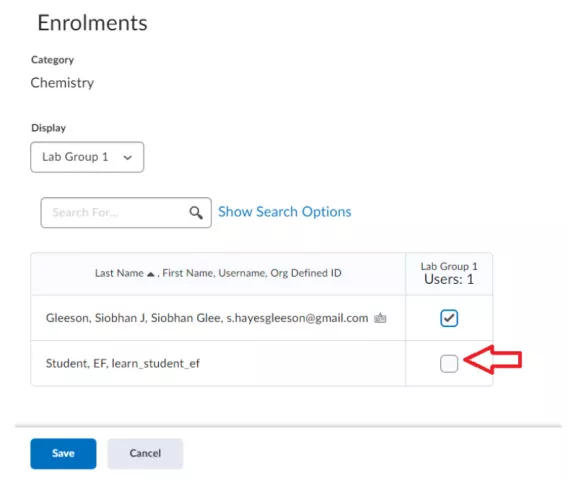
Result
The selected students have now been added.
Group Overview/Move staff/students between different groups
There is also another way to add staff/students to a group to get a group overview.
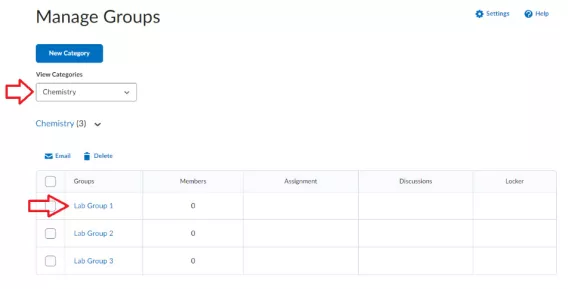
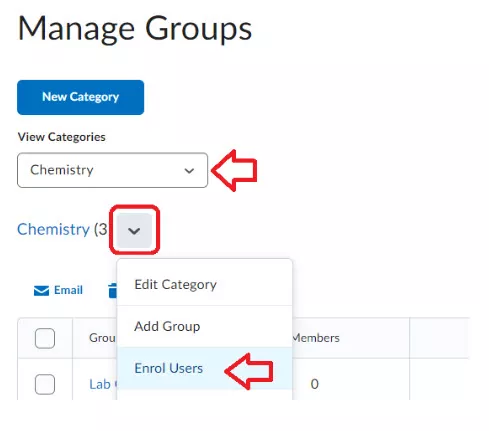
1. Go to Groups.
2. Select the View Categories dropdown to locate Chemistry for example.
3. Select the arrow next to the chosen category.
4. Select Enrol Users.
A new screen opens showing the list of students and the groups they are assigned to.
5. Add users by ticking the group next to the students name and as required.
6. Click Save.
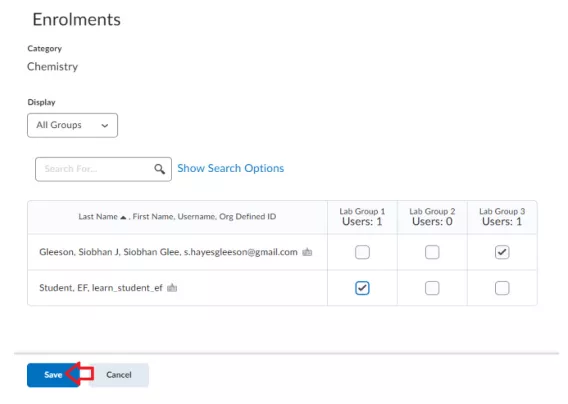
Result
The students have now been added to a group to get a group overview.
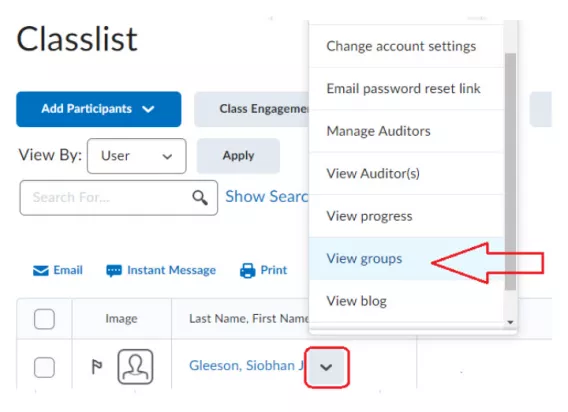
A small window opens showing the groups that the student is assigned to.
How students self-enroll
1. Within the Brightspace module, select Communications from the Navbar.
2. Select Groups.
3. Select View available groups.
4. They can then select from the groups that have space.
5. If they go back to ‘Groups’, they’ll find links to their discussion threads and also their locker (shared files area).
Targeting announcements to one or more groups
1. Create your announcement as you normally would.
2. Towards the bottom, under Additional Release Conditions, select Create and Attach.
3. In the Condition Type dropdown menu, find Group Enrolment.
4. It will then load a dropdown menu for the groups. Select the group that you want the announcement to be viewed by.
5. Select Create.
6. Post the announcement.