In the old dial-up days of the net, waiting for images to download and display was often excruciatingly slow, but, with no alternative, we would have to wait and watch as portions of the image appeared chunk by chunk.
Nowadays we have no such patience, and neither do our users. If the images on your page don’t display near-instantaneously, you are in trouble.
This is where optimising your image comes in. Optimising means making the size of your image file smaller without a noticeable loss in quality.
What size should your images be?
Recently, a 60mb image was uploaded to the UL website, intended to be used as a banner image. Bearing in mind that banner images are the largest images you will ever need to upload as an editor, it was still more than 500 times too big.
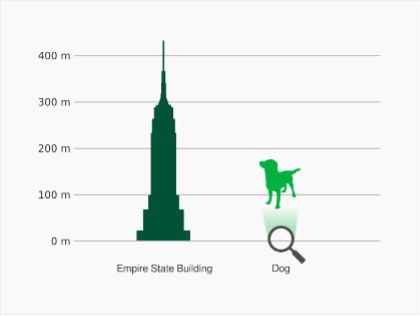
To give you an idea of scale, this is like uploading something the size of the Empire State Building, when all you need is something the size of a dog (assuming the dog is Labrador-sized).
As a rule of thumb, even large images should be less than half a megabyte (mb) in size, and smaller images (such as profile images) should not be more than 50-100kb. The offending 60mb image was resized and compressed down to approx. 0.1mb, with no discernible loss in quality.
How to optimise your images
The recently introduced limit of 5mb for image uploads to the UL website should still give you ample space to upload large high-resolution images when needed. But how do you ensure you keep your images below this limit?
This is a two-step process:
- Edit the image dimensions.
- Compress the image.
Editing an image’s dimensions
This first step will involve resizing and cropping the image in an image editor. This doesn’t need to be Photoshop – it can be done in an app already included on your device. If you are a Windows user for example, you can do this easily using the Photos app. If you are a Mac user, you can use the Preview app.
The 60mb image mentioned above had dimensions of 6166 x 15874px, which means 6,166 pixels in width by 15,874 pixels in height. As a banner, at a maximum, it should have been 1440 x 630px. To get it to these dimensions, it needed to be cropped to the correct aspect ratio (which means its width-to-height ratio or ‘shape’) and then resized to bring the width down to 1,440 pixels.
It was also a png image, and png images are generally larger than jpg images. By default, you should always opt for a jpg, and only in exceptional cases use a png (for example, if the image requires a transparent background).
Compressing an image
It's amazing how much space you can save by compressing an image without affecting its quality. The utility I would recommend for this is tinypng.com. It does a fantastic job of squeezing out all those superfluous kilobytes and serving you with a highly optimised, page-load-friendly image. And don’t be fooled by the name – it handles more than just png images.
Once I had resized the 60mb image down to 1440 x 630px in my image editor, it still clocked in at about 1mb. Using tinypng, I was able to reduce the size by nearly a factor of ten.
Key Takeaways
- Keep large images (like banners) to under half a megabyte (500kb)
- Smaller images (like profile images) should be no more than 100kb
- Before you upload any images to ul.ie please ensure they are
- appropriately sized (i.e. aspect ratio)
- compressed (using a service like tinypng.com)
4. Remember smaller images mean faster page-load speeds which makes everyone happy.