The Discussions tool is a collaboration area to:
- post
- read and reply to threads on different topics
- share thoughts about course materials
- ask questions
- share files
- or work with your peers on assignments and homework
Note the following:
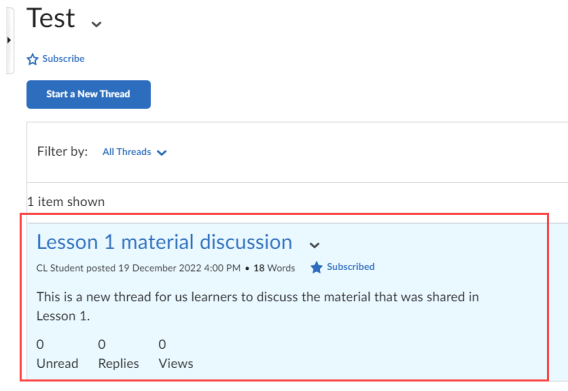
- Your instructor may choose to incorporate a word count as part of their assessment of your discussion posts. When enabled, a visual word count becomes visible in the Brightspace Editor for discussion posts. All words in a discussion post are counted, including filler words such as “the,” “if,” and “to.” The word count is dynamically displayed to you while you type in the Brightspace Editor (Discussions Reading View only) and it also appears next to posts you create in the Discussions Reading View and Grid View. You can view the word count for your posts only.
- When copying and pasting formatted content from other sources, the Brightspace Editor in the Discussions tool contains some limitations. For example, if you copy content from a document with APA formatting and paste it into a discussion thread, the formatting is not preserved. As a best practice for submitting assignments, D2L recommends using the Assignments tool. If you choose to use the Discussions tool, D2L recommends submitting documents as attachments in the tool, which preserves document formatting.
To create a discussion thread complete the following steps:
1. From the homepage, click on your desired course under My Courses. Alternatively click the Select a course icon in the top navigation bar.
The course opens
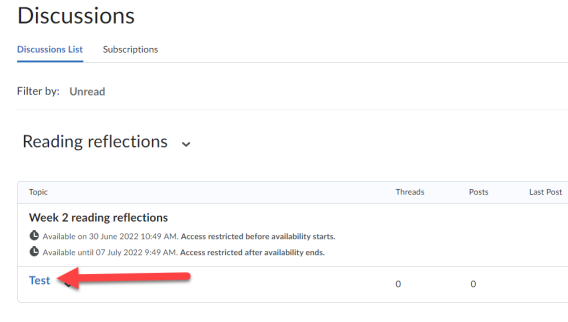
2. On the navbar, locate and click Discussions.
3. Click the topic where you want to create a thread.
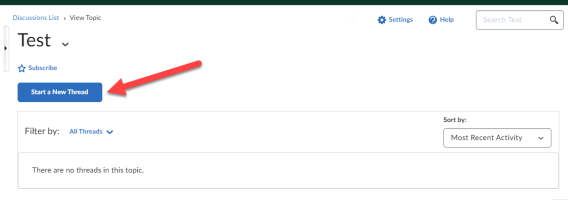
4. Click Start a New Thread.
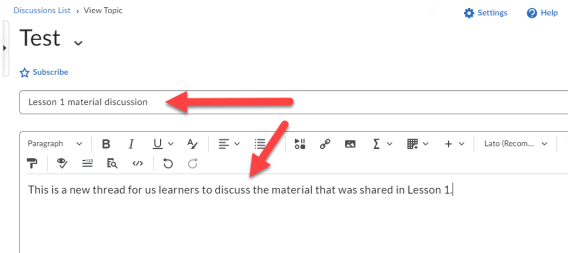
4. Enter a subject.
6. Enter your post.
6. Set any of the following posting options:
-
To keep the thread at the top of the list, select Pin Thread.
-
To post anonymously, select Post as Anonymous.
-
To receive updates on the thread using your selected notification method, select Subscribe to this thread.
-
To attach a file, in the Attachments area, click Browse to locate the file that you want to attach.
-
To attach an audio recording, in the Attachments area:
-
Click Record Audio > Record.
-
To make adjustments to your microphone selection and volume, click Flash Settings.
-
To listen to your recording, click Play.
-
To erase your recording, click Clear.
-
If you have prerecorded audio and are using a supported browser, you can drag audio files onto the attachments upload target.
-
-
To attach a video recording, in the Attachments area:
-
Click Record Video > Allow > Record.
-
When you finish recording, click Stop.
-
To erase your recording, click Clear.
-
To add the recording, click Add.
-
If you have pre-recorded video and are using a supported browser, you can drag video files onto the attachments upload target.
-
-
To post your thread to more than one topic:
-
Click Post to other topics.
-
Click Add Topics.
-
Select the topics that you want your thread to appear in.
-
To post in every topic simultaneously, select the Select All check box and then click Add Topics.
-
7. Click Post. If the topic is moderated, your post does not appear until a moderator approves it.
Result
The thread has now been posted.
-
To edit the thread, click the drop down arrow beside the thread name and click Edit Thread.
-
To delete the thread, click the drop down arrow beside the thread and click Delete Thread.