This article contains two sections:
A. Steps on how to complete this task
B. A video that demonstrates how to complete this task
A. Steps
Adding a file or document to your module using Manage files
To add files, complete the following: (There are three steps, broken down into sub-steps and also contain an instructional video for each step)
1. Upload the file to the Resources/Manage Files folder (not visible to students).
2. Link the file from the Resources/Manage Files folder into your module page (this is visible to students).
3. Make the file visible/invisible until you are ready to display it and order the reading sequence.
1. Upload the file to the Resources/Manage Files folder
Video: View “Upload a file to Brightspace” 45 sec video (there is no audio on this video).
Documentation:
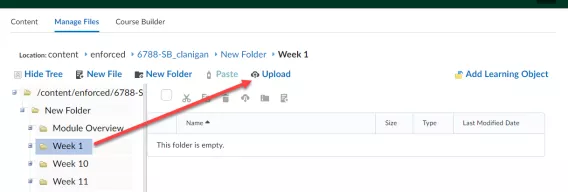
(a) In the Navbar locate and click Manage Files.
(b) Select the folder you want the file to reside. In this example the file will reside in the Week 1 folder.
(c) Click Upload.
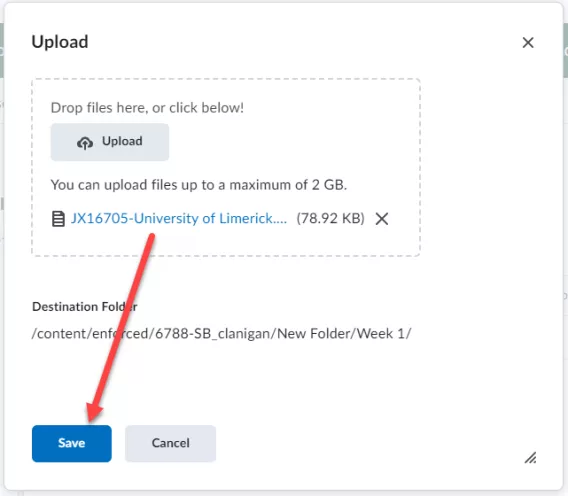
(d) Browse to add the file from your computer, or use the Drag and Drop function, to place the file from your computer into the upload area.
(e) Click Save.
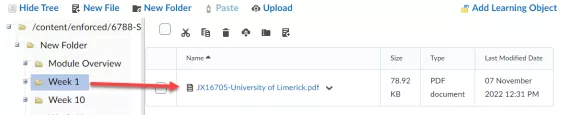
Result
The file has now been uploaded to the folder.
2. Return to the main module page to link in the file.
Video: View “Link to a file in the Manage Files folder” 40 sec video (no audio on this video).
Documentation:
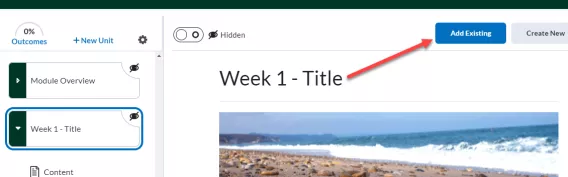
(a) In the Navbar, click Content.
(b) In the module menu, click on the section where you want the file to go. The file will lie inside this section. The file in this example is a Week 1 document so the section selected here is Week 1.
(c) Click Add Existing.
(d) Click ...More.
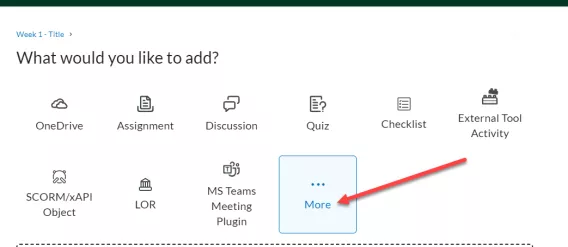
(e) Click Course File.
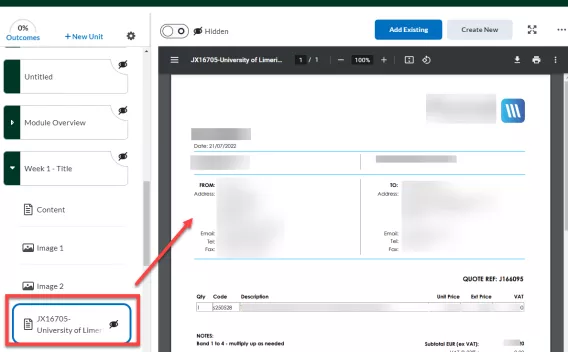
(f) Navigate to the relevant folder name where the file you uploaded is located. In the video example below, the instructor chose the ‘Module Materials’ folder and the relevant file name.
(g) Click on the file.

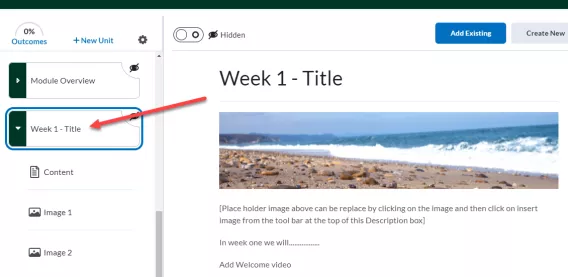
Result
The file is now in the under the section you selected. In this example it is under Week 1.
3. Ensuring the file is visible to students and ordering the file sequence
Video: View “Make a file visible to students on Brightspace” 20 Sec Video (no audio on this video).
Documentation:
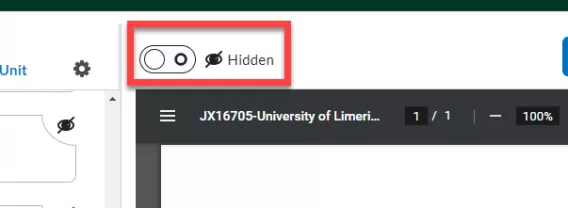
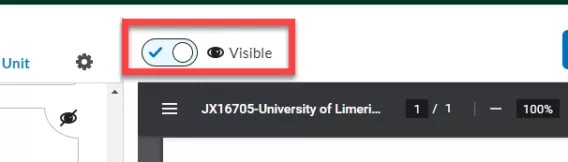
Newly added files have a status of default Hidden.
(a) To change this, move the slider from Hidden to Visible when you are ready to make the file visible.
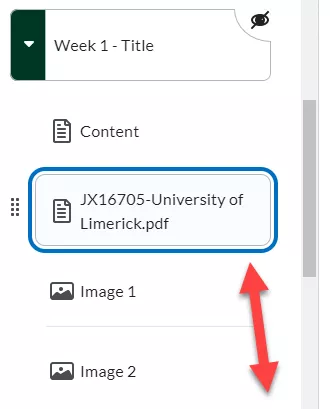
You can order the file by moving the file up or down using the left hand menu. Using the 'drag and drop' feature, you can sort it in the order that you want students to view it.
Result
The file is has now been added to the folder, linked in a module page and is viewable for learners.
B. Video
This video demonstrates how to upload a file to Manage Files : https://ulcampus.cloud.panopto.eu/Panopto/Pages/Viewer.aspx?id=9563faec… (0:45)